
Sub-Total: $0.00
How To Use Our At Home Dental Impression Starter Kit
Lumos At Home Dental Impression Kit: A Breakdown On How To Make A Great Impression.

Everything you need to know to get them just right.
IN THIS ARTICLE
Taking good impressions is crucial for your Lumos whitening treatments. These imprints of your teeth allow our dental lab to make custom fit bleaching trays that fit the exact shape of your mouth and the current position of your teeth. But don't stress, this step-by-step guide will make you a pro. If you still have questions or need help, schedule a video call to take your impressions with a Lumos team member.
What Is A Dental Impression?
A dental impression is an imprint of the teeth and mouth that records their shape, size, and position of the teeth, gums and surrounding tissues. An accurate dental impression helps our lab make an exact replica of your teeth, resulting in a perfect-fitting teeth whitening tray.
How Does The Dental Impression Process Work?
Lumos's Starter impression kit makes it easy to create a dental impression at home. Our teeth whitening kit has all the material you need to take your impressions. Fill an impression tray with the putty mixture and place it in your mouth over your teeth. The teeth will displace the impression material, and the impression material will fill up the negative space between the teeth, creating a detailed impression. The tray will need to remain in your mouth until the impression material hardens. You will then send the completed mold in our prepaid bubble mailer to our dental laboratory for further processing.
This step-by-step plan will help you create the impressions our dental lab needs. Read through the entire guide below before you get started, as some steps are dependent on prior steps done right.
Good vs. Bad Impressions
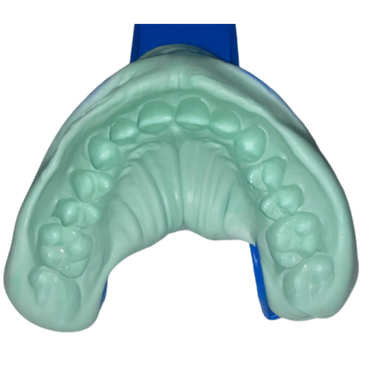
An accurate dental impression helps our lab make an exact replica of your teeth, resulting in a perfect-fitting teeth whitening tray. Small blue parts of the tray sometimes show around the tooth structure but if you have all of the aspects below it is considered a good impression.
Marker 1
Can Clearly See Captured Gum Line Around All Front Teeth
Marker 1Can Clearly See Captured Gum Line Around Molars
Marker 1Single Imprint Of Each Tooth Captured
Marker 1Putty Fully And Properly Mixed
Marker 1Even Pressure Used On Left Side
Marker 1Even Pressure Used On Right Side
What Does A Good Dental Impression Look Like?
Marker 1
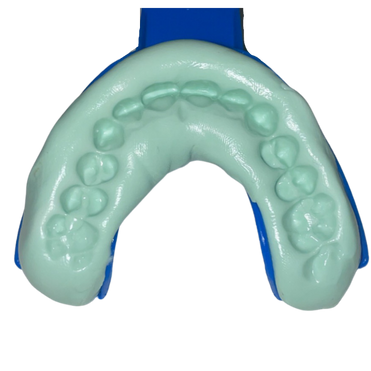
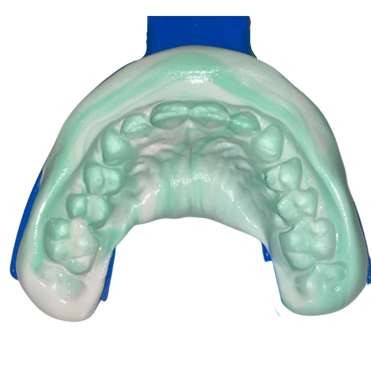
Cannot Clearly See Captured Gum Line Around All Front Teeth
Marker 1Can Not Clearly See Captured Gum Line Around Molars
Marker 1Single Imprint Of Each Tooth Not Fully Captured
Marker 1Uneven Pressure Used On Left Side
Marker 1Uneven Pressure Used On Right Side
Marker 1
Not Properly Mixed Putty
Marker 1Not Properly Mixed Putty
What Does A Bad Dental Impression Look Like?
If your dental impression looks like any of these photos above, you need to try again. An accurate dental impression helps our lab make an exact replica of your teeth, resulting in a perfect-fitting teeth whitening tray. An extra set of putty is included in every kit, simply remove the old putty from the tray and try again. As they say, practice makes perfect.
Tips & Hacks
What Can I Do To Make The Impression Process More Comfortable?
We understand that this process may seem daunting, but we promise you it's easy! Our impression material is a soft putty that does not drip, making this process achievable for the ultimate gaggers. Schedule time with one of our licensed dental professionals to take your impressions together, virtually. We know all the tricks and tips to help anyone make a great first impression. It's key to take your time, bite slowly, and take deep breaths through your nose and practice the process before you start mixing the putty. If you have had a difficult time with dental impressions in the past, schedule time with a Lumos team member to help you make a great impression.
What Comes In A Lumos Starter Kit
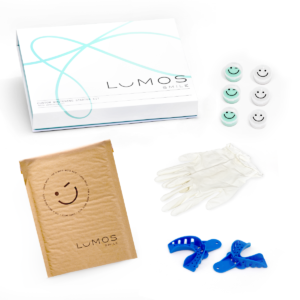
- 2 x Impression Trays
- 3 x Green Putties
- 3 x White Putties
- 1 x Set of Gloves
- 1 x Prepaid bubble mailer
Before You Get Started...
Follow the easy prep-steps below, and you’ll be well on your way to making a good impression. Bright lights and a mirror will come in handy when making your impressions. So the bathroom might be the best place to start.
Step By Step Lumos Dental Impression Instructions
Getting started is simple. You’ll be making two impressions; top & bottom. Each one takes about 3 ½ minutes to complete. Start by making a top impression, checking it to be sure it came out just right. If anything seems off, you can correct it on your second try.
Each impression must fully capture both your teeth and gums. Gently bite down until your teeth come in light contact with your tray. Use your thumbs to gently hold the tray in place and ensure that it does not move while you make your impression. The green and white putties must be fully mixed together until they are one solid color, otherwise the mixture will not set properly. Use your thumbs to apply even pressure throughout so that the impression captures your entire mouth, including your molars. You should feel the putty hitting your gums in the back and front.
Questions?
Email us at [email protected] or schedule time to speak with a Lumos team member.